Lilypie Kids Birthday tickers
Lilypie First Birthday tickers
Lilypie Breastfeeding tickers
Showing posts with label Homeschooling. Show all posts

10/18/2012

Activities to go with The Perfect Square by Michael Hall

The Perfect Square tells the story of a square who made the best of whatever happened to him and eventually found great contentment being the square that he was. A wonderful read for not just children, but adults as well, a reminder that no matter what happens to us, we make the best of the situation and find our own happiness as the square did eventually at the end of the story.


Now here's what we did for this interesting book - not as comprehensive as my other posts on literature-based learning though! :)


We tried to replicate the story to see if we could re-create the square in those ways in the book.
We did this activity over a few days as it requires quite a bit of time and stamina.

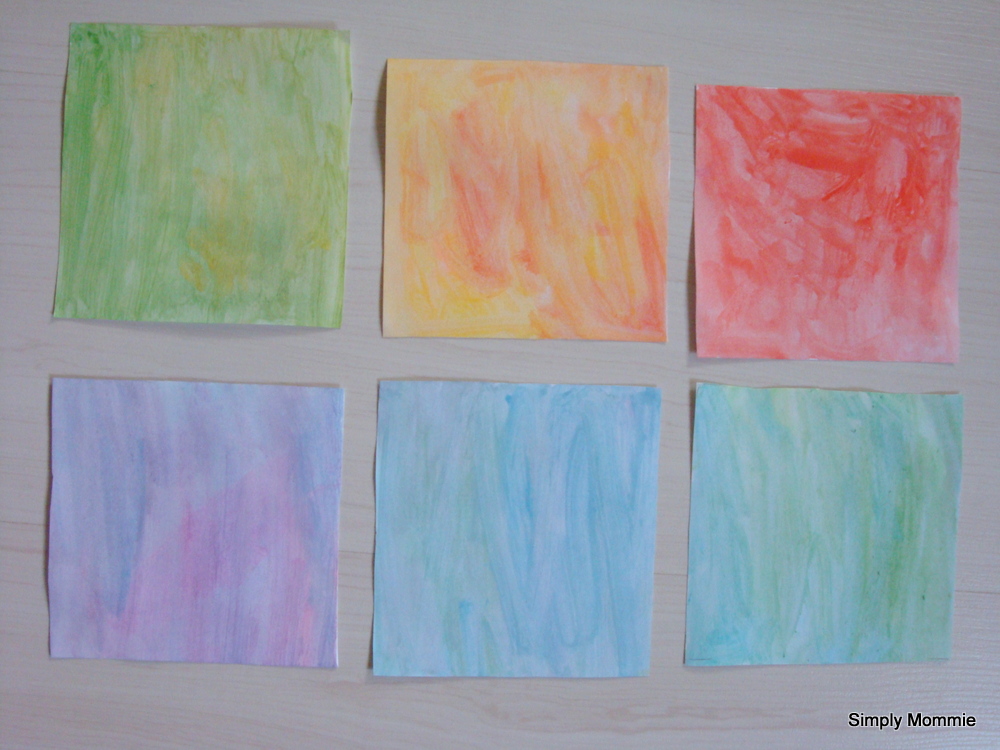
Using a piece of drawing block, I cut out 6 squares and got her to paint them in the colours the square appeared on the book.

We used water colours so that we could get a softer feel and blend of colours
For younger children, this would be a good time to teach colours apart from just doing the painting.

Completed squares in the process of drying

The squarish book and our paintings


Using the hole puncher for the first time

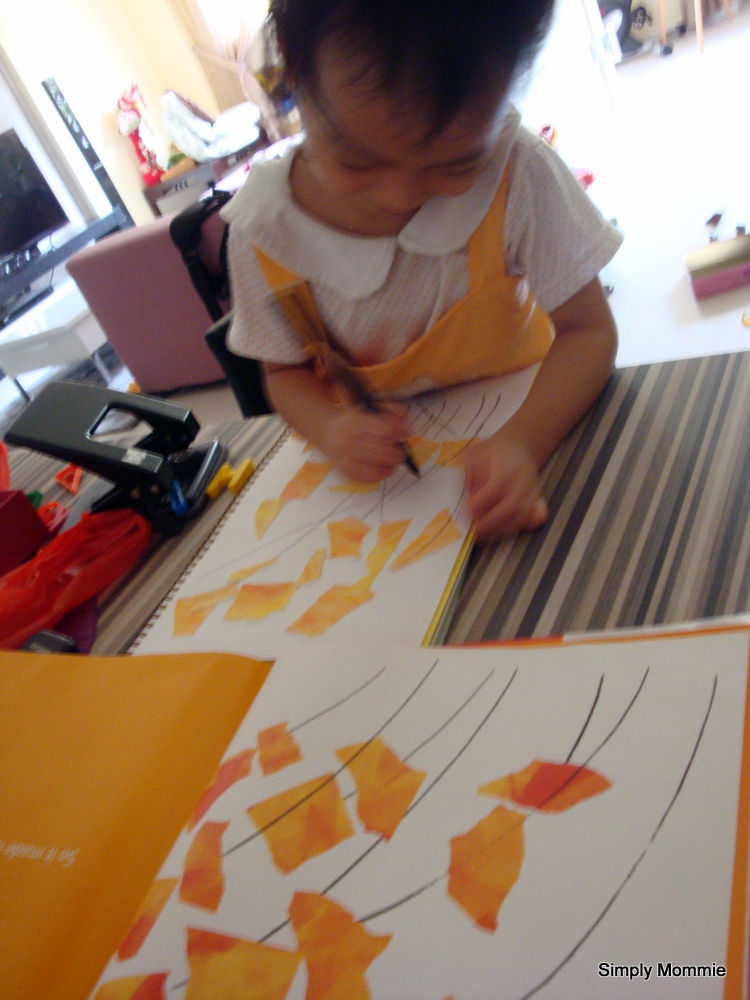
Arranging her shapes she cut out from her square to form the picture in the book

Done!

More fine motor skills involved - tearing the square into pieces

drawing in the details found in the book

Fill in the missing words with the stickers provided
Pasting in the missing words
Our completed version


Vocabulary

These are the words/ phrases I found that needed some explaining/ revision:

'shattered', 'babbled', 'torn into scraps' vs 'shredded in strips', 'ripped', 'crumpled', 'wrinkled', 'confining', 'rigid', 'cramped'


Extension activity:
Piet Mondrian-inspired art:


I pasted black tape on half a sheet of drawing block, set up the colours that Piet Mondrian used in his famous work, and got her to view examples of Piet Mondrian art on the tablet, leaving a sample next to her so that she could focus on her task.

Painting squares and rectangles

The completed piece of art which is now the cover of her A4-sized scrapbook where I stick the pictures and paintings she does in school and at home.

Other ideas that you can tap on after reading the book (for younger children):
  • Days of the week - you can re-read The Hungry Caterpillar by Eric Carle as well for reinforcement
  • Colours 
  • Shapes 
  • Story sequencing - ask the child what happened to the square on the various days and what the square became as a result.
Hope you have fun!


9/10/2012

Review of Wikkistix (and readers promo)

Who said that you need to get all messy to have fun? Well, you know I'm all for messy fun, but every now and then, I'd also like to take a breather and let my kids have fun without the mess.

When I was asked to review a pack of Wikki Stix, I was quite excited to explore what we could do with it. Wikki Stix are essentially yarn coated with non-toxic patented wax (made in USA) - sticky and reusable, and do not stain the surface they touch. Yes, you are reading right - this is something kids can have fun with without a mess you have to clean up after.


Honestly, it arrived on a day that I needed something to jazz up handwriting practice (homework from school). She was trying to distract me from making her finish up her work and then I suddenly thought, why not use the Wikkistix to make tedious and boring homework more fun? I'd planned to introduce the stix to her after she was done with her work but heck, I found a better plan!


I showed her the stix and twisted them to make the number that she was supposed to practise writing. Suddenly, there was so much fervour to get the writing done!


Then of course, she had to have a go at making the numbers herself... and continue writing.
While she was writing, I was thinking these would be great for making her count objects then use the stix to form the answer too. And we could use them for illustrating word families like cat, sat, mat, bat, using different coloured sticks for the beginning consonant, leaving /at/ as the fixed variable. And if you have many stix to play with, you could use these to form pictures too or even 3D objects.


She was twisting the stix together to make pretty 'candy canes'


And when homework was finished (within minutes - which could have very well been much longer without the Wikkistix), it was time to explore the stix further!


The sample pack I received came with 8 sticks and an activity sheet. She used the stix to join the dots.
Naturally, Alex was interested in the wikkistix too! :P

Ta da! Finished the activity with the stix!

Using Wikkistix to do dot-to-dot activities means that the activity sheet can be reused since no pencil/ crayon was used in the process - so environmentally friendly! And we all know how kids love to do the same thing over and over again. :)


I just had to do this - use Wikkistix to form Chinese characters! These sticks are soooo malleable, they are perfect for creating Chinese characters.


Done! For the small strokes which she folded the sticks many times to form (see picture above), we easily stretched them out again without the stix breaking or losing its sticky property.


I also revived my 四五快读 word cards for this activity. I chose words that were 8 strokes or less (as I only had 8 stix). Some of these words are familiar while some are new - I brought out familiar words first to make the task seem less daunting.


I formed words and made her fill in the missing stroke:


Then it was time for free play:


And she started to form shapes on her own:


On another occasion, I took out this dot-to-dot activity book she has for her to play with her stix:

She happily formed the alphabet first:


Then proceeded to join the dots:


Certainly, there are many more ways to play with these stix and you can find some great ideas here.

And for those who are looking for a way to teach the digestive system to your kids (and I know many moms who are doing this!), here's a really cool way:

Image from Wikki Stix


Because these are so small, light and portable, you can bring these anywhere to entertain your child on the go - on car rides, waiting for the food at the restaurant etc. Certainly easier to bring out than a colouring book plus crayons! A great busy bag idea if you just dump these into a ziploc bag with perhaps a couple of sheets of dot-to-dot activities or words for word formation etc.

The best part I think is that it's non-toxic (food colouring safe) so even if Alex does accidentally mouth it, it's not gonna be serious. Of course, I'm not letting him eat it or play with it unsupervised. After all, these sticks are so malleable, they could be made very small if you bend it many times. In case you are wondering, I didn't let him play with them - the instruction on the bag does say it's for age 3 years and up! :P

These stix initially started out really very sticky and left a sticky feeling on my fingers (easily removed with water and a bit of soap if needed) but after one session of playing, I felt that the level of stickiness was just nice - sticks well to whatever you're sticking it on without leaving that gooey feeling on the fingers. After a week of playing with them, these stix are still sticky enough so I think they should have quite some shelf life, in case you're wondering.

But most important of all, they do not stain. I just can't say this enough!

These stix are also useful for children with special needs and you can read more about the uses here.

Overall, I'd recommend Wikkistix to my readers for the possibilities they offer are endless. :)

With these, you can go grab your cuppa and enjoy it while your kid indulges in clean, sensorial play :)


Good News!

For readers of Simply Mommie, you can enjoy a special 10% discount off your online purchases. Simply key in Blog1209 when checking out your items at Wikkistix.


Wikkistix offers free delivery worldwide, no minimum purchase.


Disclosure: I received a sample pack of Wikkistix for this review.


9/06/2012

My lil artist - Batik paintings

I'd meant to post this much earlier but the framing of the pictures took quite awhile and I was feeling under the weather recently so I hardly had energy to sit down at the comp to blog.

I bought a total of 6 batik painting kits for Alicia to work on (at first I bought only 2 to try out but she loved it so much so I bought 4 more).

The kit states that it's suitable for 3 years and above. Although I came across this much much earlier, I hesitated because I felt that she wasn't patient or dexterous enough for painting in such great detail. Eventually I decided to give it a shot and we were all very surprised at her ability to concentrate and also at her powers of observation (checking against the tiny picture for the suggested colour scheme). 

See that tiny pic at the top of her painting (shown below)? The kit comes with pics of the rest of the available batik kits so I cut out the relevant one and placed it near her as she painted so she would not be distracted. The kit also comes with a paintbrush and the paint needed for the activity so you will not need to prepare anything else for this activity except for a jar of water to rinse your brush.


Attempt #1

Attempt #2


Attempt #3

There are 3 more painting kits and I'm trying to space them out so that she gets a variety of art activities.

We have a column in the house that could not be hacked during the renovation and my hubby had given me the 'honourable task' of decorating it. I'm so happy to say that my 'problem' has been solved by Alicia! This is gonna be her batik painting wall!

Actually my budding artist has so many pieces of art work that I might just run out of walls to hang her work some day. And Alex hasn't even started on art yet! haha...

3 more paintings to go!


Disclosure: I did not receive any form of compensation for this post. All opinions expressed are 100% mine.

8/07/2012

Playdoh mats (free) printables list!!

Have you tried the recipe for making playdoh and now you're stuck with balls of dough in the house? Or tired of simply putting out the playdoh for your child to play? Don't know what to create with your playdoh today?

I've scoured the net for some sites with wonderful (free!!) playdoh mats and put together a list for you! Do give them a try and if you have photos to share, please feel free to share them on my Facebook page :)


Playdoh mats (free) printables
  • Homeschool creations - includes alphabet (upper and lower case), spelling, math mats
  • Planet of the Apels - math mats and very creative mats. Here's a pic from the site to whet your appetite!:

  • Sparklebox - literacy activity mats, math, story-themed, topic-themed mats and even playdoh recipes 
  • Making Learning Fun - various mats (even has one for Brown Bear!)
  • Storytime and more - Halloween playdoh mats (includes a mat for you to make more 'spiders' for those of you who are on a bugs theme) - Halloween's 2 months away: more than enough time for you to prep these for use then!
  • Primary Treasure Chest - Topic-based playmats (includes topics such as minibeasts, dinosaurs and fruits)

Have fun!!

8/02/2012

Sensory bags for the kids!

I decided to make sensory bags for my kids, with little Alex in mind in particular as I'd like to introduce him to more types of sensory play. 

A sensory bag is basically made up of stuff you put in a bag that won't burst the bag (read: no sharp objects) and yet offers some sensory play for the child. So basically anything goes as long as it doesn't break the bag (e.g. gel, liquid soap, shaving cream, embellishments, buttons etc.). 

Little Alex has played with his leftover food (yes, I let him play with only the leftovers - after all, it's all gonna be thrown away so I might as well let him have a go at it) and he loves to crush cauliflower - somehow he thinks that it isn't food because he never tries to mouth the florets which I give him for finger food. He always crushes the florets and has this look of glee when the florets are in bits and pieces in his palms. Babies.

Since sensory bags can offer safe sensory play for babies, I decided why not?

So I got down to making them for my kids.

Here's the math themed sensory bag for my girl. This was too small a baggie and I have since transferred the stuff into a bigger bag so that we can play I Spy with her. Too small a bag means that all the items are squashed together and it's difficult to play the game.


Items that went in my math themed sensory bag:
  • gel sticker numbers
  • heart-shaped beads
  • some sequins
  • glitter
  • liquid handsoap
  • food colouring


And here's the all things bright and sparkly bag for the baby boy:


Items that went in this bag:
  • liquid handsoap
  • lots of glitter
  • lots of different shaped sequins and embellishments

Remember to tape up the sensory bags to prevent leaking and supervise your children at all times as little teeth and sharp fingernails could pierce the bags.


I added colouring to one of the bags the next day and my girl realised to her delight that she could practise her handwriting! :)

Simply use your fingertips to 'write' on the sensory bag! Here she practised her Chinese strokes but she also happily practised writing alphabets. So wonderful to find another use for my sensory bags since she's not so into squishing the bags!


If you have a preschooler who's learning to write, or if you've a little baby and you want to introduce safe sensory play, give this a try!

I'm gonna try to make a shaving cream sensory bag as well as a water beads sensory bag too... when I get my hands on the materials... :)

Do share your sensory bags on my Facebook page if you make some! 

*edited on 3/8/2010:
Please try to use freezer bags as they are thicker and have a double zip instead of a single one. Mine kept leaking after awhile as I was using normal storage bags.

7/23/2012

Home-made Playdoh

Alicia fell sick over the weekend so she had to miss school today. To cheer her up, I decided to try something different with her and we made playdoh! I was really quite apprehensive as even though I've been reading quite a bit about making playdoh, it was a different thing trying to put the act together.

Nevertheless, I'm very glad that the recipe I worked with worked well, with some impromptu alterations as I made the playdoh:


I've received some queries about the playdoh recipe I used on my Facebook page, so here it is!:

Ingredients:

  • 2 cups plain flour
  • 1/2 cup salt
  • 2 tablespoons oil
  • 2 tablespoons cream of tartar
  • up to 2 cups boiling water 
  • food colouring (I worked with only red, blue and yellow)
  • glycerin (optional, for extra shine - I didn't use it this time)

Directions:
  • Mix the ingredients together (except water and food colouring)
  • Pour in the boiling water. Don't pour 2 cups in immediately. Adjust as you go along.
  • Stir continuously until it becomes a sticky dough.
  • Let it cool down a bit then knead it vigorously for a few minutes until the texture is that of playdoh. 
  • If it's still sticky, add a bit more flour and knead again. Adjust accordingly. (I personally had to add more flour using this recipe)
  • Separate the dough into as many balls (I made 8) as you wish to colour using the food colouring.
  • Add the food colouring to individual balls then knead in the colour till the dough is of a solid colour.
  • Play!!!!

Invitation to play: playdoh and coloured craft sticks


Welcome to Alicia's little ice-cream shop!


Even lil Alex (9mths) had a go at it! Well, he tried to have a bite of it too! But I guess it tasted very bad as he didn't try to eat it again. :P


Note: I didn't scent or add glitter etc. to the dough this time as it's my first attempt at making playdough and I wanted Alex to play with it too. I'm too paranoid that he'd eat the glitter etc. but I may try to add these the next time round! 


4/12/2012

Rainbow icecubes

We made colourful icecubes yday by mixing diff coloured water. After mixing blue and red, blue and yellow, I decided to show her how adding more blue to a blue+yellow combi changes the shade with each scoop she scooped into her container (and I poured out the result into the icecube tray).

Making the different shades was fun but as usual, after awhile, everything ended up the same colour... Haha. Free water play after tt!

8/15/2011

Activities to go with The very hungry caterpillar by Eric Carle

It's been quite awhile since I've found time and energy to blog... this is such an overdue post!

The good thing though is that The very hungry caterpillar is a classic so it's never too late to share what we did for the reading of this story.

I made this learning aid from here:


There are a couple of missing pieces though but it still works rather fine.

I got her to match the pieces to what she could see on the pages to practise counting:


and instead of a 'story stick' (which is how the learning aid is supposed to be made), I gave her a piece of yarn for her to thread the pieces together, following the sequence of the story:


And so it's killing two birds with one stone: getting her to practise fine motor skills as well as learning to sequence according to the story line. She did really well with the sequencing after awhile such that by the time she watched the performance put up by Act 3 in mid July, she could tell exactly what was coming up next :)


After threading all the cards, just tie a ribbon and she gets a necklace - which made the vain little one very happy. This activity can be done over and over again - something that your preschooler would request to do!

And we chose a day to make egg carton caterpillars:


My girl loves all things small and cute so instead of making 3 long caterpillars, we had 5 short ones. 


Painting the egg carton was quite a highlight as it was a new experience.

After the paint has dried, just draw and cut out eyes for the caterpillars (or use googly eyes), draw a smile, pierce two holes at the top of the caterpillars' heads (to be done by an adult) and poke the pipe cleaners in.
Do you notice that there's one female caterpillar? :) 
Hint: the one with the eyelashes

We made a symmetrical painting by first folding a piece of drawing block in half then squeezing paint randomly on it. Once that is done, press the drawing block together and you will get a symmetrical painting. After you have done the first fold, you can unfold it and press the other side of the drawing block together and repeat the process. :)


After the paint has dried, draw a butterfly and cut it out:


We did this counting activity which you can download here:


Alicia wasn't very interested in this activity compared to the rest of the activities but you can always give it a shot. 

Another activity that might interest your preschooler would be these two dot-to-dot printables which you can download here.

We took the chance to revise the Days of the Week using the learning aid my mum made for her earlier (I made the Mandarin version):


Have fun!

LinkWithin

Related Posts Plugin for WordPress, Blogger...